Almost everyone has seen green algae growing in pools, reservoirs, or bird nests, but few people have detailed information about them. Algae or more precisely “microalgae” are microscopic plants that float in water. You need a microscope to observe a single algae; But usually in the oceans, their density causes a green layer to form on the water. Algae are amazing and in fact they are a new type of products that can be found in any part of the agricultural land and can be cultivated. Algae grow in hot springs and in acidic, alkaline and salty waters where no other organisms can live. Algae can be grown in the desert (with only a little water), in industrial effluents and on the surface of the ocean, without the need for any soil or agricultural land.
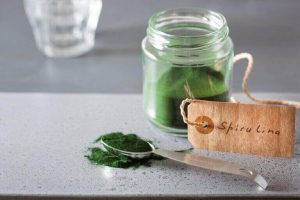
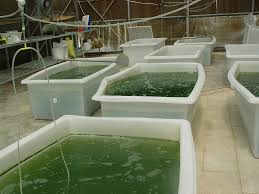
Cultivation of spirulina algae
When you swim in water pools, green things stick to your body. These are the algae that grow naturally. But in general, pure cultivation of one species of algae is a difficult task; Because adding nutrients to the water for the growth of the species in question may inadvertently cause the proliferation of wild species of algae. As pulling out billions of microscopic weeds is probably a very difficult task. In addition, many species of wild algae can produce toxins that cause serious problems. Therefore, while it seems easy, it is not that simple and you should avoid procrastination. This is where spirulina steps into the arena. Spirulina is alkaline, in the sense that it likes to grow in very alkaline waters and in conditions of acidity above 10, in which almost no other organisms can grow. Wild spirulina species grow in lakes and natural reservoirs.
For hundreds of years, native people have been growing spirulina algae and benefiting from this very nutritious food source. This situation for new algae growers means that as long as you keep the acidity at a level above 10 and in
If you take general precautions such as covering the tank and washing your hands before working with the algae, you will remove the pure culture. Spirulina is one of the different types of algae that can be grown in open and semi-open ponds, indoors or outdoors. However, it is very important to monitor it in larger ponds; Because if the pH level decreases, the possibility of contamination is very high. The pH test is very important in the cultivation of spirulina algae, and in fact, testing it seasonally is inseparable in the cultivation of spirulina.
Harvesting Spirulina
Even if the product obtained from the cultivation of algae looks bulky and green, it is about 99.9% water. In fact, to use algae, you have to somehow remove them from the water. Since the cells
Algae are microscopic, this issue can be an interesting challenge! Many types of algae to extract from the environment
They need relatively complex equipment.
The most common method is to use a centrifuge, which is an expensive equipment. But for spirulina cultivation on a small scale, especially home cultivation of spirulina, the special and spiral shape of spirulina solves the problem to a great extent. Because the original form of spirulina is like a spiral spring, which is easily and easily extracted by filtration. It is enough to pass the obtained products over a cloth, catch the algae on top of it.
They do, but water passes through it. The spiral shape of spirulina means that the collected algae has many openings that allow water to pass through the mass of algae. This problem is in contrast with small and ordinary cellular algae, which are among the best fabrics.
They pass through and even if your fabric has enough openings, the cells quickly create an impermeable mass that slows down the filter process, but this spiral property of spirulina has made its home cultivation also have something to say and can be used for some enthusiasts. Slow income generation.
Those interested in home cultivation of spirulina algae can contact the Algae Dream team of Pars.
Ways to contact the dream of Algae Pars
Necessary equipment to grow spirulina algae at home
An aquarium or other transparent container to keep the culture: a 40-liter aquarium is a good size to start with. Always keep one key factor in choosing a container in mind, and that is the ability to cover all parts of the crop. Another important factor is that the container you choose can be easily and completely cleaned at any time.
Cover for your tank:
Air should not collect in the tank and in fact you should allow air bubbles to escape, but it should be kept away from dust and other pollution.
Live spirulina: one liter or less of spirulina palatensis is required.
Air pump: Choose an air pump with a suitable size for a 40 liter tank.
A number of aquarium air pipes: you need a number of aquarium pipes to be able to pull it from the place where you place the air pump to the bottom of the tank.
Air Stones: You need air stones to generate bubbles inside the tank.
More than 4 clothespins: or other clips.
Pipe with a diameter of 2 centimeters: you need a length of 1 to 1.5 meters of a pipe with a diameter of 2 centimeters for drainage.
pH strip or pH meter: To be able to measure a wide range of pH between 5 and 10, you need a pH meter.
Fabric selection: fabric or lace with 40 to 50 micron holes.
Nutrients: For advice and information about the nutrient instructions for the maximum cultivation of spirulina algae, contact the Algae dream team of Pars.
Tablespoons and teaspoons: special measuring spoons
Two 40-liter buckets: You need at least two 40-liter buckets to store the crop.
Equipping the following items is not required, but it can be effective in more efficient production.
Aquarium heater: able to maintain the temperature of the tank at 25 degrees Celsius or more. If your plant gets a lot of sunlight and your house is not too cold, you may not need a heater.
Aquarium thermometer: to control the culture temperature.
Water pump: for faster and easier removal; The smallest type of aquarium pump answers well.
Scale: for measuring and combining nutrients (its accuracy should be within 0.001 gram, i.e. one milligram.
Microscope: It should be at least 100x magnification, but you are looking at 400x magnification.
Spirulina growth
If you have prepared a liter of starter culture, you can add it to the tank as soon as the tank is set up and start working. If you start with a small tube of algae cultivation, you should grow it to about one liter. When your starter bottle of spirulina is moved, it’s obvious that you need to keep the container tightly closed to prevent spillage. But as soon as you can, place it in a place where it is exposed to a lot of light other than direct sunlight. Remove the cap, and if you have a cotton bud, use it to close the opening of the bottle so that it can breathe without contamination. If you don’t have cottonwood available, it’s good to just leave the cover a little loose.
If you have an air pump and air tube, insert the bubbler into the culture to mix the culture. If you don’t have these tools, shake it gently to mix the algae. Do this at least once a day. Jalabak
In this way, it can be kept alive for weeks and sometimes even months. But if we reduce this period to a minimum, they will grow better.

Setting up a spirulina algae breeding tank
To do this, your tank should be placed in a suitable place. Then start the air pump, bubble maker and heater. Since the turbulence created by the bubble prevents algae from gathering and will help it to stick to the wall, it is better to place the bubble maker in a position that is close to the walls and if possible close to all the walls of the air bubbles. A flexible bubble tube is very suitable for this purpose; Because it can be placed along the edge of the tank. If you have a container with a different shape, try to repeat this arrangement several times. Connect the bubbler to the air pump, place the control valve along it to prevent the culture from returning to the air pump. Tap the valve to make sure it is in the right direction so that air can flow through it.

Aquarium heater can be dangerous. It is necessary to turn them off every time you take them out of the water, even for a short time; Because its temperature can burn the skin. Also, if you keep the heater on outside of the water and then
Put it in water, it may break the glass. This is a dangerous condition, because now you have a bare electrical device in water, which can shock a person if it touches the water. Pull the power cord, then touch the heater.
Now fill a quarter of the tank. Install the heater correctly. Place the heater in the bottom of the tank and make sure that the hot part of the heater is completely submerged. Spirulina will grow better when the night air temperature is cold; Therefore, set the timer to turn off the heater at sunset and turn off the heater two to three hours before sunrise. If you use the lamp for breeding, turn off the lamp with the heater.
A thin crop, especially a crop that has just started, is more sensitive to light than a mature and dense crop. Excessive light can damage spirulina cultivation. For this reason, first protect your crop from direct sunlight by using a thin white cloth; This fabric still allows a lot of light to pass through. If you are using a lamp for this, you may need to turn it off or dim it a bit when starting a new stitch. When the cultivation is dense, it needs more light. Making a growing medium includes mixing the right amount of water with the right amount of ingredients. Using the wrong water can destroy your spirulina. The best water that is used to mix nutrients is water.
It is filtered by a carbon filter, the water is well dechlorinated. Spring water can also work well; Of course, if possible, you should filter it again.
So far, if you are familiar with the preparation of the substrate and the basic equipment for spirulina cultivation, it is time to start cultivation. If you have any doubts up to this point, be sure to contact the advisors of Raya Algae Pars and then enter the next step, spirulina cultivation.
Start of spirulina algae cultivation
Prepare enough water to fill a quarter of your container. For a 40-liter tank and a 1-liter bottle of starter culture, 10 liters is a good amount to start with. If you use pre-made mixes, add 1/5 tablespoon of powder to every liter of water. For 10 liters, dissolve 15 tablespoons equal to one cup minus one tablespoon of the mixture in 10 liters of water. If you are using iron water that has already been prepared, or if you are using iron water that you have obtained by using citric acid, use the necessary amount for 10 liters of it. One spoonful of iron solution in every 5 liters of water is suitable for starting or continuing cultivation. Mark the water level on the side of the tank.
It is a good idea to use only half of the starting bottle (about half a liter) at the beginning. Do not keep half of it for the day. However, if you use all the bottles, the plant will grow faster.
Finally, cover the surface of the tank with a suitable cover, but with a small hole to allow air to escape. If you do this correctly, you should easily feel the entry of air through this hole with the back of your hand. A good way to cover the surface of the tank is to use a piece of clear plexiglass. This will protect the algae from invaders and other microorganisms, dust, etc.
Step by step harvest of spirulina product
Here we explain the simplest way to harvest the home product of spirulina algae. In this method, you need the following items.
a 10 or 20 liter bucket; hose about 70 cm; a 1 x 1 square meter cloth; 4 clothes pegs
Place the bucket next to the tank. Wash your hands and wrists completely. Use a sieve to remove any lumps before harvesting. This process goes faster and you can harvest more spirulina if you place the bucket lower than the tank. If the bucket is on a suitable level, emptying will be done quickly and without overflowing the filter and the bucket. Use the clamps to secure the filter cloth on top of the bucket. You can also use a large sieve to hold and support the cloth.
Use a hose with a diameter of about 2 centimeters and by lowering it into the crop area, make it completely filled with the crop. This will happen if the hose is U-shaped, and if there is a ring in the pipe, it will not work. When the tube is full, hold one end of it with your thumb and then suck. You can also use a small pump in the hose, which will make the job easier.
Do not allow the bucket to fill to the point where it touches the bottom surface of the filter cloth. Look at it and prevent it before it happens. Collecting the spirulina stuck in the cloth is done by raising the edge and gently shaking it, which causes a mass to form in the center. You can collect them all in one place using a spoon.
Using one movement, as if you are milking, gently push the mass towards the center and press this mass until the remaining culture comes out. Stop doing this when you see a greenish liquid coming out of it. If you squeeze too much, the spirulina thread will break. If the pressure is low, the harvested mass may have a slightly bitter taste due to the presence of sweet boil in the environment. You will soon learn the correct way to squeeze the mass.
Open the fabric. It contains fresh spirulina that you have grown. If the spirulina sticks to each other more than the fabric and easily gathers in the form of a mass, this means that the spirulina spiral is long and shows that the algae has grown well and has not broken.
If you want more shots, repeat these steps or create equipment for more shots. If you want to be able to remove it again soon, do not remove more than half of the tank volume through the fabric filter. Use a tablespoon to collect the spirulina. Check the volume of harvested spirulina. For every tablespoon of freshly harvested spirulina, mix 1 teaspoon of compensating mixture with one liter of water and pour into the tank (mix it with the strained culture medium that has passed through the fabric filter). Also, add the iron solution according to the environment of the harvested culture.
Harvested spirulina should be dark green. If it is not like this, don’t eat it. The cloth can be washed with warm water and a little soap or it can be placed in the top rack of the dishwasher and cleaned. Some spirulina producers rinse the harvested algae before eating and wash the remaining culture medium before eating. If you are going to do this, don’t squeeze the spirulina, but instead soak the harvested algae in a bowl of fresh, clean water, mix it well, wash the spirulina strands, then follow the harvesting methods above. Use again and remove the spirulina from the water. After washing, you can squeeze them.
We hope that in this article we have been able to introduce you to the stages of production and harvesting of spirulina magic algae. If by reading this article you are interested in the production and cultivation of spirulina algae, but you have vague questions in your mind, the Algae Dream team of Pars is proud to answer your questions. Those interested respond.